Showing posts with label Zig. Show all posts

Monday, August 5, 2013

Frosted Designs Monday Inspiration - Embossing

Hi everyone, it's time for some Monday inspiration for the new Frosted Designs challenge!

 Our sponsor for this challenge is
  Molossi  
You can see what they have in store here,
They will be offering a 30.00 chipboard and bling pack to one lucky winner!!


I think wet embossing was one of my first techniques that I tried when I was first learning to scrapbook that both thrilled me and scared me, lol I can still remember my first failures at it, but unlike some things I use to do ages ago, ( like decorative scissors...ahem..) this is one that I still love to do. I still have my original heat gun too!

 I used 2 different styles of embossing, the first one is dry embossing where I ran a piece of my gelli print paper through my big shot with a leaf texture plate and then cut the leaves out by hand. The second type of embossing was wet, I stamped the sentiment and drew my faux stitching lines with an embossing pen and then heat set it with powder.

entering this in:
Creative Inspiration - Inspired by Anything Goes

Stampin' UP! - embossing buddy
Close to my Heart - embossing powder
Ink it Up! - white pigment ink
Zig - emboss writer
Sheena - embossing folder
Big Shot
Gelli Plate
American Crafts - flower
brad - misc.
Best Occasions - Textured stack

Tuesday, May 28, 2013

sky pilot: noun

clergyman; specifically : chaplain

pronunciation
-----------------------------------------------------------------------------------------------------------------------
Page Maps - boy-girl challenge with Stephanie Perdue + Fancy Pants prize! 

 "Create a layout, based on the sketch above, in a boy or girl theme. We'll be looking for something creative in place of the flowery embellishment on the sketch." 

So here is my LO, with acorns and leaves replacing the flowery element. I also added a button instead of more flowers alongside the journaling.
 and a close up for your viewing pleasure:
I altered the colors of the orange dots on the polka dot paper by coloring them in with a lighter pink so that they would match the colors of the flowers better and used pink letters and numbers to further tie in the colors together.

I loosely glued the acorns and leaves down so that they have dimension, without using any pop dots 

also entering this in:
Anything but a Card - #20 Dust off your old supplies

Fancy Pants - button ( the only FP product I had )
Little Yellow Bicycle - brown woodgrain and polka dot paper, journal card
 ( Used really old papers from my stash for  the background and an old piece of hoarded vellum )
Cricut - Stretch Your Imagination, p. 46  ( acorns )
Simply Scarecrow - ( leaves )
Ranger - Distress Marker, Distress Ink
ZIG - marker
Signo - white pen
Heidi Grace - pink sticker letters
Sandy Lion - expoxy numbers

Sunday, May 26, 2013

pertain: verb

to belong as a part, quality, or function 
 to be appropriate to something
 to have reference

pronunciation
----------------------------------------------------------------------------------------------------------------------


Hi everyone, here is your Monday inspiration over at Frosted Designs where our new challenge is to use punches. What do you mean it's not Monday? sshhhh....don't tell on me, I am posting this a day early, you really weren't suppose to notice!  I do hope you go over and see what the other lovely ladies on my DT have come up with, the creativity astounds me sometimes!

OK, so coloring on the canvas was a wee bit of a learning curve. When it's wet my gelatos ran...so had to wait for it to dry and then went back in with my pens to try and straighten out the coloring a bit. They color much better with markers. I added some glitter to the wings.
I admit I don't have many punches. I never invested in them especially after getting my Cricut machine, but I have a waterfall punch and used it here on the bottom of my card.

Little Yellow Bicycle - Acorn Hollow pattern paper, canvas bee
Faber Castell - PITT pens, gelatos
Traveling Typewriter - font

This weeks sponsor is :


And by playing along, you could win this....


So get punching!
----------------------------------------------------------------------------------------------------------------

I seem to "bee" working a theme here :) 
I think it's bee-cause I've been out in the garden working lately!

entering this bee-utiful card in:
( last bee pun, promise! )

Inkspirational sketch challenge

 The honeycomb was made using paints and a stencil with my gelli plate.

Cricut - Art Nouveau, p. 56
Plaid paints
ZIG - writer
Traveling Typewriter - font
Ranger - Glossy Accents
American Crafts - Mr. Huey's stencil
Faber Castell - PITT pen

Sunday, April 21, 2013

xenophobia: noun

 fear and hatred of strangers or foreigners or of anything that is strange or foreign
pronunciation
----------------------------------------------------------------------------------------------------------------------
Cute Card Thursday - #265 Cakewalk
CARDZ TV - #28 Cute as a Button


Do you think a sticker has to stay in the way it was made? Or do you like to alter them? I buy sticker sheets for usually about ½ of them, and then have leftovers that use to drive me crazy because I felt I wasn't getting my moneys worth...now I love the left over stickers because I can play with them, change them up, alter them and it's fun!
 
Tip 'o the Day!
 Here, I had used half of this sweet little glittered flower border and had a portion left over so I used my hole punch to remove those flowers and put them on the cupcake as sprinkles. And if you look at the tag itself, those cute little bees were all cute out from the sticker sheet. ( I do recommend placing the stickers on a piece of paper before cutting, makes it very easy then. ) That big Happy Birthday sticker is another one I changed up, it was too big for the tag so I removed an element and then ran a line of stickles around it to hide where it was cut off.
So, alter..or leave in your scrap pile in case you might need it one day...which way do you roll?
 
Viva - Pearl Pen
Little Yellow Bicycle - striped paper, bees, sticker sentiment
Ranger - stickles
candy buzz - font
Cricut - Rock Princess, p. 77 ( cupcake )
Stretch Your Imagination, p. (tag )
Zig - marker
---------------------------------------------------------------------------------------------------------------------

Fantabulous Cricut - #156 April Showers
Chocolate,Coffee, & Cards - #37 Download
Sketch as is on left, and flipped on right

 
As you can tell I chose to flip the sketch over;
The umbrella was cut out of chipboard and then the handle was cut off so I could lift the canopy up for some dimension using Liquid Scrap Dots. Added some faux stitching to the canopy.

Cricut - Everyday Paperdolls, p. 42
My Little Shoebox- pink cloud
American Crafts - felt flowers
felt flower brads - misc.
Copic
Zig Writer
Assorted sprays
Fiskar - embossing plate
Helmar - Liquid Scrapdots, Gemstone Adhesive

Saturday, April 20, 2013

admonish: verb

 
to indicate duties or obligations to
and
 to express warning or disapproval to especially in a gentle, earnest, or solicitous manner
also
 to give friendly earnest advice or encouragement to
 
-----------------------------------------------------------------------------------------------------------------------
Bitten by the Bug2 - Welcome Baby
Sparkles Monthly Challenge - #43 Hearts
Sister Act Card Challenges - #3
Little Scrap Pieces - Bundle of Joy
 
 
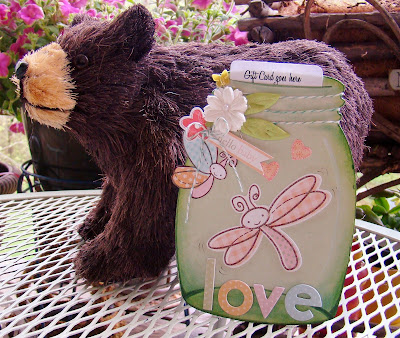
I've had a couple of inquiries about how does the gift card fit onto the front of the cards, so here is a quick tutorial


Add lots of embellies!!

Little Yellow Bicycle - Snuggle bug, Girl
Cricut - Doodlecharms cartridge, p. 95
Prima - flower
Maya Road - butterfly pin
May Arts - leaves
Helmar - 450, Liquid Scrapdots
Faber castell - PITT pen
Scor - Buddy
Ranger - Distress ink
Zig - marker
 

Wednesday, April 17, 2013

verbiage: noun

 
a profusion of words usually of little or obscure content
or
manner of expressing oneself in words : diction

---------------------------------------------------------------------------------------------------------------------
 
entering my mermaid 6 x 12" wall hanging in:
 
Anything but a Card - Challenge #17 April Showers ( water themed project )
 
The background was created with Ranger distress paints and Imagine's goosebump spray. I used bubble wrap to soften the colors and spread them out. After it dried I ran the sheet through the printer for the words using the Super Delicious BT font. Then I drew my mermaid with a Zig Ocean marker.
 
Her tail section began with some glitter paste, which gave her bottom half very nice texture. I then dropped Ranger alcohol inks into it which spread..dangerously so...but in the end I was able to keep them contained. But I admit it was a touch and go moment! I used Helmar 450 to attach the chains to her waist, throat and wrist.
 
One of my favorite parts to this wall hanging is the border I created with the Atlas maps. It's created with 2 strips which made for a nice inlay look to it. ( one strip is ½" and the other one is ¼", layering the ¼' strip on top of the wider one ) Her body and hair were created with Faber Castell geltos and various pens and markers. However, I still struggle with faces.

Lastly I added a few micro beads for her bikini top...I do usually make modest mermaids, ;)
 

Sunday, January 20, 2013

preen: verb

   1: to groom with the bill


 2: to dress or smooth up : primp
 
3: to pride or congratulate (oneself) on an achievement : to behave or speak with obvious pride or self-satisfaction


------------------------------------------------------------------------------------------------------------------------
Anything But a Card - Tie it Up! ( I used chains, yarn )
 
"Challenge 11 asks you to incorporate things that can be tied: twine, ribbon, thread, wire, rope, cording, trim, chain, seam binding, etc! You don't have to really tie it, but you get the idea! "
 
 
OK, so my mind went straight to 50 Shades of Grey, ( what's new, right? ) lol But, thankfully my creativity went Bollywood instead! I had decided to work on another mermaid wall hanging ( since they seem to sell well at the Art MoB ), and I already had the background "paper", that came from the bottom of my spray box,( as you know, if you have been following my blog; I have created several projects in the last week from this one sheet of wax paper. ) So anyway, that was my starting point. And since I had been playing with an old craft hobby of mine, Gallery Glass,  I wanted to make a mermaid using it.
 
And she developed and preened, she dazzled, as only mermaids can.
 
I truly love how the Gallery Glass mixes together!!
 
I truly believe when I make them that they create their own personalities, and I wonder how much control do I really have?
 

Plaid - Gallery Glass, Blue Diamond,Copper Sparkle,Kelly Green, Cameo Ivory and Redi Lead strips
American Craft - Galaxy marker ( white )
Ranger - Distress markers
Zig - writer
Faber Castell - PITT pen
beads, yarn - misc.
Ranger - Dylusions Fresh lime


Saturday, January 12, 2013

remuneration: noun

compensation, payment
 
-----------------------------------------------------------------------------------------------------------------------
 
I love to wet emboss, and I did something totally different today because I embossed with 3 different colors! It as fun to do too!

entering this in:
 
Paper Smooches GDT challenge ( free digi )
Divas by design - Anything Goes
Delightful Challenges - Add Hearts
 
I used my embossing pen to outline the digi image one color at a time. I used the double sided tape to outline and emboss the base card stock.
The heart shaped window is pop dotted up and set over a cloud paper.
 
Zig - Emboss Writer
Stamp-n-Stuff - Red Dragon embossing powder
American Crafts - Zing Brownie embossing powder
Prima - Goldsboro paper
Therm O Web - double sided tape
cloud paper, black embossing powder, pop dots - misc.
Aleene's Tacky Glue
Fiskars - fingertip knife
 
But ya know, it just didn't look finished, so I hope you don't mind that I tweaked the card a tad. First I wasn't happy with the added line of embossing off to the left of the heart, it had a bend in it that I didn't notice until I posted the photos...and the top loop of the "h" had dulled a little because of the gold gelato. I thought it was a done deal, regardless of not being happy with it. I went to bed....and I thought....and I thought....I just couldn't get it out of my head. And then....while reading my latest James Patterson book, out of the clear ( 'cause obviously the book Cross Fire had NOTHING to do with a squirrel card! ) an idea came to me...he needed a red balloon to be floating from, and the embroidery thread would smooth out that kink too....ahh..and while I was at it, I covered the dulled "h" with my black pen.
Ok, so was it worth getting back out of bed for?
....yes sireee it was!
DMC - embroidery thread
Frances Meyer - balloon sticker
Helmar - Zap Dot 
 
Your comments are the only remuneration that I need....OK, so I'd like to win too. :)

Sunday, November 25, 2012

fusion: noun

 a merging of diverse, distinct, or separate elements into a unified whole
------------------------------------------------------------------------------------------------------------------------
I finally got a chance to play with some more of my new Ranger Dylusions sprays. On the background board I sprayed the Fresh Lime all over and spattered the Vibrant Turquoise on the right side and bottom where I had planned on painting my mermaid. I also spritzed it with water to get those under water bubbles ;)
 
I first drew her body with the XS Faber Castell Pitt Pen and then took my water brush and smoothed out her body. I had to take my Golden gesso and paint over her to tone down the skin color. Then I re drew over the black line with my Faber Castell Colbalt Green brush and drew her facial features with my Zig Ocean Writer, filling in her lips with the Colbalt Green and adding Ranger's Glossy Accents over them. I used Ranger's Patina stickles for eye shadow.
 I love her hair. I used plain white yarn and sprayed the same Dylusions colors and let it dry, then adhered the strips of yarn with my Aleene's Tacky Glue, curling some strands and unraveling some bits of yarn to get that wild floating in the water look. I added small sea shells, ( used from an old shell necklace from Hawaii ) flowers and gems into her hair with my Tacky Glue. ( I love the sea shell I added for her bra top, it was one I bought back from my last beach trip! )
The tail was created with a fusion of Faber Castell's Metallic Gelatos and netting, outlined with Patina stickles.
I had to take a break from Christmas crafting and make something different. I love drawing mermaids and always think of my friend Jamie when I make one. I hope you enjoy it...I know  enjoyed the undertaking another mermaid.

entering this in: