Saturday, March 31, 2012

Trillium: noun

Any of various plants of the genus Trillium, of North America, the Himalaya Mountains, and eastern Asia, usually having a cluster of three leaves and a variously colored, three-petaled flower. Also called birthroot, wake-robin.

This week's Cricut Circle Challenge is:
Create a scrapbook page, card, home decor item, or other project with a Springtime theme. You must also incorporate ric rac and at least one sticker, and include at least 2 Cricut Image Cuts.

This is what I made:
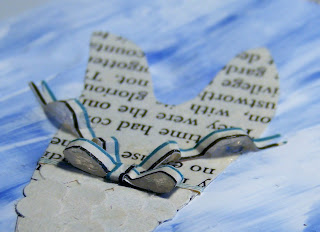
Sometimes there are advantages to living in an apartment. For me, it's the fact that I have an enclosed stairway so I can create my paper crafts to hang on my front door without having to worry about nature destroying them. So I made a huge bunny head as my welcome Easter door decoration!

Weekly Challenge #55: Springtime Challenge!
bunny shape - free hand drawn and then cut out of card board
Paper Trimmings cartridge for the flower
Storybook cartridge for the flourish
rick rack - Really Reasonable Ribbon Monthy Club assortment
butterfly sticker, gem - K&Co.
paper - Best Occasions Textured Stack
sticker letters- Heidi Grace
Helmars 450 and Aleene'e tacky Glue
chalk, button, plaid bow - from stash

...and leaving you with a picture of a Trillium I took yesterday while on my hike. Just love all the wild mountain flowers blooming right now!

Lovely day outside! Think I'll go sit on my balcony for awhile!

Friday, March 30, 2012

knothole: noun

a hole in wood where a knot has fallen out or been removed

Spent yesterday hiking one of the cutest trails ever, very scenic and not a very hard hike either, so everyone had a good time. I hope y'all have a fantastic week end spend it doing whatever it is that you enjoy!
I had so much fun taking pictues through the knot holes of the fence! lol

using Aperature Priority, 6.30
shutter speed 1/100
reduce your ISO setting to 80
This way your camera is focusing on what's in the distance and not trying to focus on the wood that right up to your camera lens. I could have darkened the wood out completey in photoshop but I actually like seeing what your looking through.

And the waterfall that was our destination.

Thursday, March 29, 2012

tweak: transitive verb

to make a slight adjustment or change to something, especially in order to improve it or fix it

Hi everyone! As you read this I will be hiking Pearson's Falls, but I wanted to leave you a close up of what was on my desk yesterday. I received a lot of comments on it, and thank you! It means so much when someone leaves a kind word for you!

It's a take off on lesson #4, from Elizabeth's Altered Book Lover class. I had some shell stickers that I loved, actually several sheets of them, lol, so I got to use up a whole sheet, which made me feel good to use up some of my stash! The background is gesso ( 2 coats ), then a couple drops of glimmer mists spread out, then sprinkled with coarse glitter, and lightly brushed over with a third layer of gesso. Then I simply layered the stickers along the bottom and the title on the top. I then added my sticker letters. Now afraid things wouldn't stay stuck I then put a layer of clear coat on top of that. And then a dusting of fine glitter over everything.


The quote is from Comedian Steven Wright, but I had to tweak it a little so it would fit on my page:

"I have the worlds largest seashell collection. You may have seen it, I keep it spread out on beaches all over the world."

A question here, I normally write the author of the quote when I use them, but since I changed it, what do I do? Would love some suggestions! Please!

I also had 'issues' with the title because I thought my page had dried; but evidently not all the way and my title peeled up when I had opened it back up. Luckily I had another one so was able to redo it and this time made sure everything was dry before closing it. I keep going back and checking on it too just to make sure, lol

I hope everyone has a wonderful day!!

Wednesday, March 28, 2012

y'all: plural second-person pronoun

Is a contraction of the words "you" and "all", Southern, Informal

It's Wednesday, and what does that mean?
it's WOYWW...which means means 'what's on your workdesk Wednesday'!
where we get be nosey and snoop......errrr visit each other :p
and what's on mine, you ask? did you ask?
My altered book and the current pages I am working on!
 That's whats on my desk and all the stuff that goes with it ! I am just having a world of fun with this project and would love for y'all to join us over at Altered Book Lover  where we are on lesson #4, and if you want to see every one's progress, their links are at the bottom of Elizabeth's post!
I'll be posting the layout  (you see on my desk ) to my blog tomorrow if you want to see it better :)
-----------------------------------------------------------------------------------------------------------------
Now onto my AB progress
Elizabeth over at Altered Book Lover gave us some assignments this week and I really enjoyed this one. All my elements on this page came from the pages I had torn out when "thinning" the book. I FREEHAND cut EVERYTHING...lol...can you tell I impressed myself? It's been hard to not add pen, ink, stickles...I'm not kidding you, but I wanted this page to have a unique twist to it. I like the design incorporating the pages of the book itself.

The only pen used are the quotation marks and the author of the quote.

the assignment:
4. Create a double page spread using gesso as both the background AND the glue to which you will add your page elements and embellishments.


I first spread the gesso on the page, let it dry and then applied the second layer, while it was still wet I add some drops of blue paint and then using my spreader to mix it into the gesso. I had precut my sea weed and coral beforehand and had a dry run for the placement of everything so I was able to lay them directly onto the wet gesso. The coral is the only element that I used the gesso as glue, everything else was glued down with Helmars Acid free Glue.

The small bow on her tail and the flower in her hair are supported by Helmar's Liquid Scrapdots, so they will not get flattened. One of my all time favorite glues. This page has been weighted down ( after it was dry ) by my Big Shot, just to show you how well these delicate pieces are staying dimensional!


-----------------------------------------------------------------------------------------------------------------------
Now Ms. Julia wants us to keep it short, and I failed miserably but then you can't expect a girl to behave every week.....can you?
Ok, now this is where I'll be sitting with my laptop while visiting your blogs.
Outside on my balcony, sipping ice tea, listening to the birds singing, and and feeling the sun shinning on my toes....
ahhh this is the life!

-----------------------------------------------------------------------------------------------------------

Saving the best for last! I got my WOYWW button in the mail yesterday and little monkey mojo is proudly displaying it! Thank you Julia, you are too sweet to do this!

Tuesday, March 27, 2012

chilly: adjective

moderately or noticeably cold, usually enough to cause discomfort

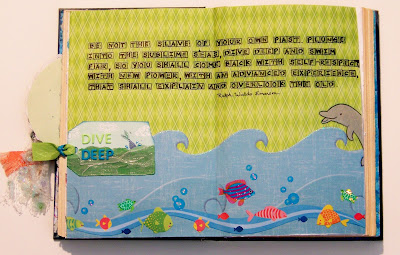
A short post today, another 2 page spread for my Mermaid AB. I am really enjoying the class over at Elizabeth's Altered Book Lover, and if you have ever wanted to make an AB, she has great instructions and the class is free! Awesome, right?

The link to make the vellum tag is here:


Well, must run some errands, it's a bit chilly today, back to long pants and long sleeve shirts, no sandals today! Spring is hard on a girls wardrobe!

Monday, March 26, 2012

shrinkage: noun

the amount lost when something is decreased or reduced, or when it shrinks

Altered Book Lover's class by Elizabeth

2. Create one double glued page using gesso. Document how it behaved when you worked with it.

Now I guess it might be considered cheating, but I knew the results I would get as I use vellum quite a bit and know that any wet glue will make the vellum curl and wrinkle. BUT I was planning an underwater scene so I used it to achieve that wavy watery feel.  So with confidence I applied my gesso and laid down the vellum sheet to be adhered.


Now one thing I didn't anticipate was the shrinkage. I very rarely want this wavy effect when using vellum so I didn't know about the waves and wrinkles pulling on the book's page. It actually pulled it in about 1/4". If you look closely you can see this and this picture also shows the wavy texture of the page better before I applied a technique that Elizabeth provided which was:
"If your pages warp and you can no longer place a weight over the closed book, simply cover the back side of your page with a thin layer of gesso. That may not eliminate the warp, but it will decrease it a great deal."


So I applied a thin coat of gesso to the next page, plus a piece of lace to the edge to hide the shrinkage and "glued" the next page to the back of the shrunk page. It did help to smooth it out some and I was again pleased with the results. Thanks Elizabeth for that tip!


So yes, I did learn a new technique when you have a real wrinkly page and you want to smooth it out a little. So, a smarty pants like me still learned something, even though going into this page I thought I knew what the results would be.

Old dogs, new tricks and all that.....:)

Sunday, March 25, 2012

pinning: transitive verb

to fasten, attach, or secure something with a pin


I am going to try and make Sunday a day that I show what I have made from being inspired by Pinterest. I love the ideas I have been getting there, so much fun goodness to share with everyone!

I have been working this 'succulent' color palette into some elements on my back porch. It comes from Design Seeds, and when pinning or blogging, always, always try and give credit to whence it came from!

For my project I also got an excellent idea from this pin, no source given :( What I liked from this picture was the title they added to the binding.
Pinned Image

So from those, came this, which I am going to use on my back porch, under a potted plant. I love my porch and it is definitely my "happy place", so hence the title. I sealed it up, gesso'd and painted it like Elizabeth taught us to do over at Altered Book Lover, and in simplistic terms, it is an AB.
( and yes, my book is more purple...oh well, might try and tone it down later to a more muted tone )

Letter Envy cartridge
Don Juan cartridge
Then I have been wanting to make this from Make it and Love it, and if you want to make one then hop on over to that site and it has a tutorial:
Pinned Image
This is my version, I used a basket weave paper ( not because it's Easter ) but because I have a rooster/chicken theme kitchen and that's where I hang my charger up. See...right under that rooster night light!

Maya Road - flower
Helmar 450 adhesive
paper from stash
Now I am going to make another one cause this one is a little too small! It works but it take some maneuvering to get it all in there, but I LOVE the no cords!!


Then the last project isn't 'pinned' inspired. It kinda comes from doing the AB, and I have all these pages from the book sitting around so I thought I would mod podge this little cutie and sit him out in my "flower garden". He originally was a Christmas ornament that I was going to get rid of but I think she now has a new life on my porch. 
This is the planter it sits in, and those pansies are left over from last year!! man, they are blooming like crazy!! Usually I don't get 2 seasons from annuals but that shows you how mild a winter we had!
So if you pin, and made something from it, I would LOVE to see what you've done! Please share a link to your project so everyone can visit too!
I hope y'all are having a great week end and happy pinning! :)

Saturday, March 24, 2012

perch: noun

any temporary resting place for a person or thing

I thought about it for days trying to figure out a way to display my newly decorated watering can on my back porch and finally it dawned on me to use ribbon to suspend it from the railing so that it would appear tilted like it's in use. And I added a dab of hot glue for reinforcement to make sure it perched just so....lol I love this! You can go to this post if you want to see how I made it or the Cricut cuts that I used!

Really Reasonable #44 Spring with ribbon theme

And speaking of backyards, which leads me into the wild life, and as many of you know I love to take pictures of them. I have 3 elusive birdies out there, a Red Bellied Woodpecker, an American Redstart and a Cardinal. Now I know that most of you will think, OK, I understand the first 2, but a Cardinal? Yes! This silly little bird will NOT pose in a good place LONG enough for me to get a decent shot. ..sigh....doesn't he know all the adjustments I have to make to my camera to get a close up shot of him? Well, so far, this is as good as it's gotten! ( grammar alert, I know )
Look at him, he's looking right at ME! I swear he's laughing too while hiding behind that branch! I'll get you my little pretty! One day!

Friday, March 23, 2012

bonus: noun

an extra unexpected advantage


I've always prided myself on teacher's pet ability, so when I hear bonus ( or extra credit..no wait, extra credit was for when I was failing the class and had to do more work just so my parents didn't thrash me....oops....TMI? ) but anyway, I am Elizabeth's favorite student, even if I have to say so myself! HA! Of course I am just joking around, right? wink wink

We had a lot to accomplish for lesson #4, over at Altered Book Lover, but this was a fun assignment for me as I love playing with glue!

This was #5 on our list:
Find at least one way to use white glue as a major ingredient in a technique for a page you will either add to your AB, or on a page that is already in your AB.

So I wanted to create some bottom of the sea elements, and truthfully this one looks a lot better in my head than it does in the book, but this is about experimenting and playing around. I took my white glue ( Aleenes Tacky Glue ) and 'drew' some fan coral on a piece of parchment and then sprinkled it with glitter. After it dried I put a layer of Ranger's Candy Crackle over it. After that dried, I added the glass beads. Still not happy, I then inked it with green and blue...then I gave up and peeled it from the parchment and glued it down onto the vellum paper...sigh...It's actually very pliable too, I tested to make sure it wasn't going to fall apart and bent it and moved it all about just to be positive.


This was #6 on our list of to do's:
 A spread that includes any type of glue or adhesive will be considered an added bonus

So my first play is by using my hot glue gun to 'draw' squiggly lines to represent coral. You just 'draw' on a wax or parchment paper and then sprinkle with glitter, and then peel them up once they are dry and glue them down ( I used Aleene's Tacky Glue ). And for anyone who like to gold leaf, this is also a great technique, just wait until it cools off and hardens and your gold leaf will stick like a charm! ( I have made Christmas trees in the past using this gold leaf method. )

Also as part of #6, I also used gesso to glue down my vellum to give it a wrinkly under water look. I'll go more into that on another post though, but here is a peek:

And the tag's 'tail' was a lot of fun to create. The mesh is from the super market, the clumps of glitter are hardened Candy Crackle from the inside lid of the jar, loose beads, shells, and the occasional sequin were thrown in too. The aqua beads dangling were from an old necklace of mine, long ago reallocated to the craft junk drawer, basically anything I could find to glue on I did. I have to say this one embellishment totally engrossed me! lol And another glue I want to mention is Helmars 450, that's what I used to hold all these lovely goodies in the mesh. A wonderful glue that acts similar to a hot glue gun but you don't have to worry about burning your fingers! Bonus!

Go get your glue on and have fun, experiment, and create an altered book with us. We love to have you join us!

Thursday, March 22, 2012

vellum : noun

Modern imitation or "paper vellum" is made from plasticized cotton

and a little history of vellum:
Vellum (from the Old french Vélin, for "calfskin")[1] is mammal skin prepared for writing or printing on, to produce single pages, scrolls, codices or books. It is generally smooth and durable, although there are great variations depending on preparation, the quality of the skin and the type of animal used. The manufacture involves the cleaning, bleaching, stretching on a frame, and scraping of the skin with a hemispherical knife. To create tension, scraping is alternated with wetting and drying. A final finish may be achieved by abrading the surface with pumice, and treating with a preparation of lime or chalk to make it accept writing or printing ink

Helmars V2 Spray, Ranger Candy Crackle and vellum, those are the 3 products that I used to make my circle element on my seahorse tag:

Since I had a lot of questions and comments  on this tag yesterday, I thought I would share with you how I created this pretty element.

First off, I keep an old Cricut mat as my spraying board for the V2. Since it stays sticky from any over spray it does an awesome job holding down light weight pieces to be sprayed. So, first I cut my shape and sprayed it with the V2 and adhered it to the tag. V2 is awesome as it will hold down your shape without making the vellum curl or warp.

I am making a new tag, so please forgive the new shape :)
Next, tear strips of vellum. Keep in mind when tearing that your water strips all need to be horizontal so that it emulates the waves of the ocean. I laid all the strips upside down on the cricut mat and sprayed them. Then layered them onto the vellum shape. On the circle, I had to trim the edges to fit the circle shape, a rectangle is much easier to follow.

After they are all assembled, I then layered the Candy Crackle on top.

 Now keep in mind that you will have to repeatedly check on your vellum while the crackle is drying since it is a heavy wet layer, the vellum will curl up dring this process.

I simply wet the tip of my finger ( ok, so I lick it, ssshhhhh ) and press down any edges that curl up or lift away.

And there you have it, trim it out as desired. If you have any questions, please feel free to ask and I will answer them as soon as I can.

and a just so you know note:
I usually don't have a plan when creating something, it just flows and this is one of those times. I did make some adjustments as you can tell, like adding the solid paper for the sky. I did discover that you can simply lift the edges to the vellum while it is still wet from the crackle, to slide in the paper and then press the vellum back down...whew..right? I also free hand cut the mermaid from one of the books pages and then inked her and added a small rhinestone to her tail. The clouds are doodled...some fancier people call them zentangles, but I've done this type of doodling for a long time, and to me it's just doodling, lol

green ribbon - Really Reasonable Ribbon
blue ribbon and paper - from stash
white pen - Reminisce
vellum - NRN
letters- Sandy Lion
Helmars V2 Spray
Rangers Distress Candy Crackle, Liquid Pearls

Wednesday, March 21, 2012

WOYWW 146 : verb

gawping at pictures

It's a highly technical term :0

OK, enough of making fun of Julia...but she asked me to keep it brief...a girl has to have some form of retaliation doesn't she? Your gonna back me up on this ....right? errrr....right? Well, if my link gets removed from the post over at Stamping Ground, then I'll know she didn't enjoy my sense of humor...hee hee

Well, this is my desk. Ok, can't keep it that simple...lol...You can see my Big Shot doing double duty as a weight, it's holding down my AB book. I just love this class by Elizabeth, Altered Book Lover: go do it, it's sooooooooooo much fun to get your fingers so gluey they stick together, gesso on your face, ink every where and let's not even discuss the glitter and beads...:)

Here is a sneak picture of what we are working on in lesson #4, Glue and Gesso. One part is making tags too, so here is a look at my tag:
Well I am off to see what everyone is up to today...was I brief enough? :p

Tuesday, March 20, 2012

aspiration: noun

ambition: a desire or ambition to achieve something


I love getting my fingers messy, playing with paint has become fun again for me. I look forward to Monday nights with Tracy and the rest of the gals. While Tracy paints, we talk, lol and really enjoy the camaraderie of creating together. If you would like to join us then by all means, come play with us on Monday nights
( 9pm est ). Just go like the Helamr FB page and then you will get a reminder for the class!

So last night poor Tracy was trying to paint and we were cracking jokes at her palm tree, and someone came up with "It looks like it could be a Walmart tree". All I can say is that Tracy is a good sport for putting up with us!

Sometimes that all it takes from me to get an idea, and this is what I came up with....

Not every tree can be a Walmart tree....but then some of us lack IMAGINATION


First I put a layer of gesso down on a piece of 6x12" cardboard, next crumpled a plastic bag and blotted it. Then used acrylic paints to create the background. I next used gesso again to paint the palm tree onto the background and once dried painted it in. The green paint is actually a glitter glaze that I gobbed on ( technical term ) to give it a dimensional look.


Next I sprayed some mists on and let them run down the board. Then tore a piece of tan paper for my sandy beach and glued sea shells on using Helmars 450. I outlined and stickled, just cause I cannot help myself :) The writing is Tracy inspired, she did it on a project and I have used it a few times since then!
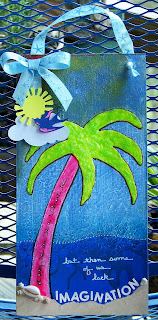
Then I punch some holes in the top, run my Really reasonable Ribbon through them and knot. I also cut a cloud and sun ( Paper Dolls ) and the bird ( French Manor ) from my Cricut. Pop dotted them with Helmar Zap Dots.

So from a a lot of giggles and laughter came a funky little 'Wally' inspired art.
------------------------------------------------------------------------------------------------------------------
An on a side note, my watering can from yesterdays post was featured on the Cricut Circle Blog as project of the day!! Yay me! lol

Sunday, March 18, 2012

hindsight: noun

the ability or opportunity to understand and judge an event or experience after it has occurred


How I 'dun' it:
First I cleaned the watering can, then put 2 coats of gesso on it. ( Using my succulent color palette from Pinterest ) I mixed up a dusky lavender and painted it with 2 coats of paint. ( The saying was also taken from Pinterest, just tweaked a little ) Then cut my letters out from Don Jaun at 1/2", and my flower from Stretch Your Imagination at 2", and the flourish from French Manor at 2". I then used a clear gloss enamel and stuck the letters on while it was still wet. Then went back and covered the letters and the entire watering can with the clear gloss enamel again.


In hindsight ( I always notice things after I have taken a picture of them ) I would have moved the word 'plants' over to the left by one spacing so that the flower pot would have lined up with the middle of the flourish.

Entered in Cricut Circle Blog Weekly Contest: Decorative Letter Challenge
Unique Crafters Challenge March challenge #1
Inspiration from:

and no link provided for this pin:

So here is another successful day of pinning and creating something from the pin.
Have you pinned lately?
Better yet, have you made something from your pin?

If you have, then Sarah, over at It's on the tip of my tongue, would love for you to post your project and then link it up there so everyone can see that endless hours of sitting on the couch and pinning really can be put to productive use! HA!


Saturday, March 17, 2012

yummy: adjective

very appealing to taste or smell

Here is another Pinterest find...and a yummy one at that! Now, just so you know I don't pin food recipes, I go ahead and head over to the link and put the link in a recipe file that I already had started. This one came from Life Hacker, for "Bake an Egg in an Avocado For a Fast and Healthy Breakfast Treat". That just sounded intriguing and I had to give it a whirl.

The first try was almost disastrous as after following all the directions, my avocado tip over while putting it in the oven and the egg spilled out. Lesson 1 learned, avocados don't have flat bottoms! HA!

Next try I made a little cup out of tin foil and placed the avocado in it and that has worked very well.

Lesson 2,  if you like a lot of avocado with your egg ( and I do ) don't use extra large size eggs, ( which is what I currently have in my fridge ) because the directions tell you to scoop out some avocado to make room for the egg, and being that I'm using extra large eggs, it means I waste some of the egg white that spills over the edges...oh well....lesson learned.


I bake mine for 20 minutes, then turn off the oven and top with cheese. Then put back into the oven to melt. ( The picture above has little brown spots on the pans which are the bits of cheese that didn't make it to the avocado, lol ) So far I have use shredded Italian and Pepper Jack, and both have been very good too!

So, have you made anything from Pinterest? If you have we would love to see what you made, what you thought of it, etc. Sarah, over at It's on the tip of my tongue is asking everyone to show what they found over at Pinterest and to see what they made using that idea. So it's show and tell time ladies!

I hope y'all have a wonderful week end and Happy St. Patricks Day to everyone!
waving hi and wearing green from the hills of North Carolina :)