Showing posts with label Helmar Crystal KOTE Gloss Varnish. Show all posts

Wednesday, March 26, 2014

Collage:

 Introduced by the Cubists, the technique of creating a work of art by adhering flat articles such as paper, fabrics, string or other materials to a flat surface such as a canvas whereby a three-dimensional result is achieved.


-------------------------------------------------------------------------------------------------------------------------------------


This is the gelli plate print that I thought I was working on, it's funny how it turned out to be only one of the ones I was actually working on at the time. I just didn't know it. I do plan on coming back to this one....but I got side tracked.....SQUIRREL!!

So, as I was working on the above print, I used my journal to press my handmade stamp onto after each pull to clean it off. I had already messed this page up with some inks sprays ( playing with the new TH Spritz Marker, LOVE it btw ) so this page became a "play page"...you know what I mean! lol

My hand made stamp was created by using puffy paint on a piece of cardboard to create the raised areas. The size of the stamp is 8 x 12", so it's HUGE! It was inspired by Carolyn Dube a while back and it has become a favorite of mine to play with. 

So I thought I was finished and began the cleaning up process of taking packing tape to remove the dried up paint off of my gelli plate.

I'm about ½ way done here, as you can see it does a pretty good job of removing the paint. Just press the tape down and rub it firmly with your fingers to burnish it onto the plate and then peel up. I learned that little tidbit from the Gelli Arts blog.

before tape

I wasn't very happy with the initial result I was getting on my art journal page, but always knew I could gesso over it or "whatever" later on...


So as I was peeling off the tape, which had a good amount of paint on it, the thought occurred to me to lay it back down over the journal page piece. Just to see how I liked it. I have to admit I fell in love with and it was not something I had set out to do. Funny how that happens, but now I was off on a totally new project.
after tape


The painted packing tape gave it some color but it's still not very defined and it's very slick and shiny which represents a whole new set of challenges...what to do next?


Sooooo....the day before I was discussing Sharpie Oil Based markers vrs their water based markers with Tamiko and she popped up a video which made me go...duh, me! It says that they aren't very good on chalky surfaces but work great on non porous materials....like packing tape perhaps? Let's give it a try!

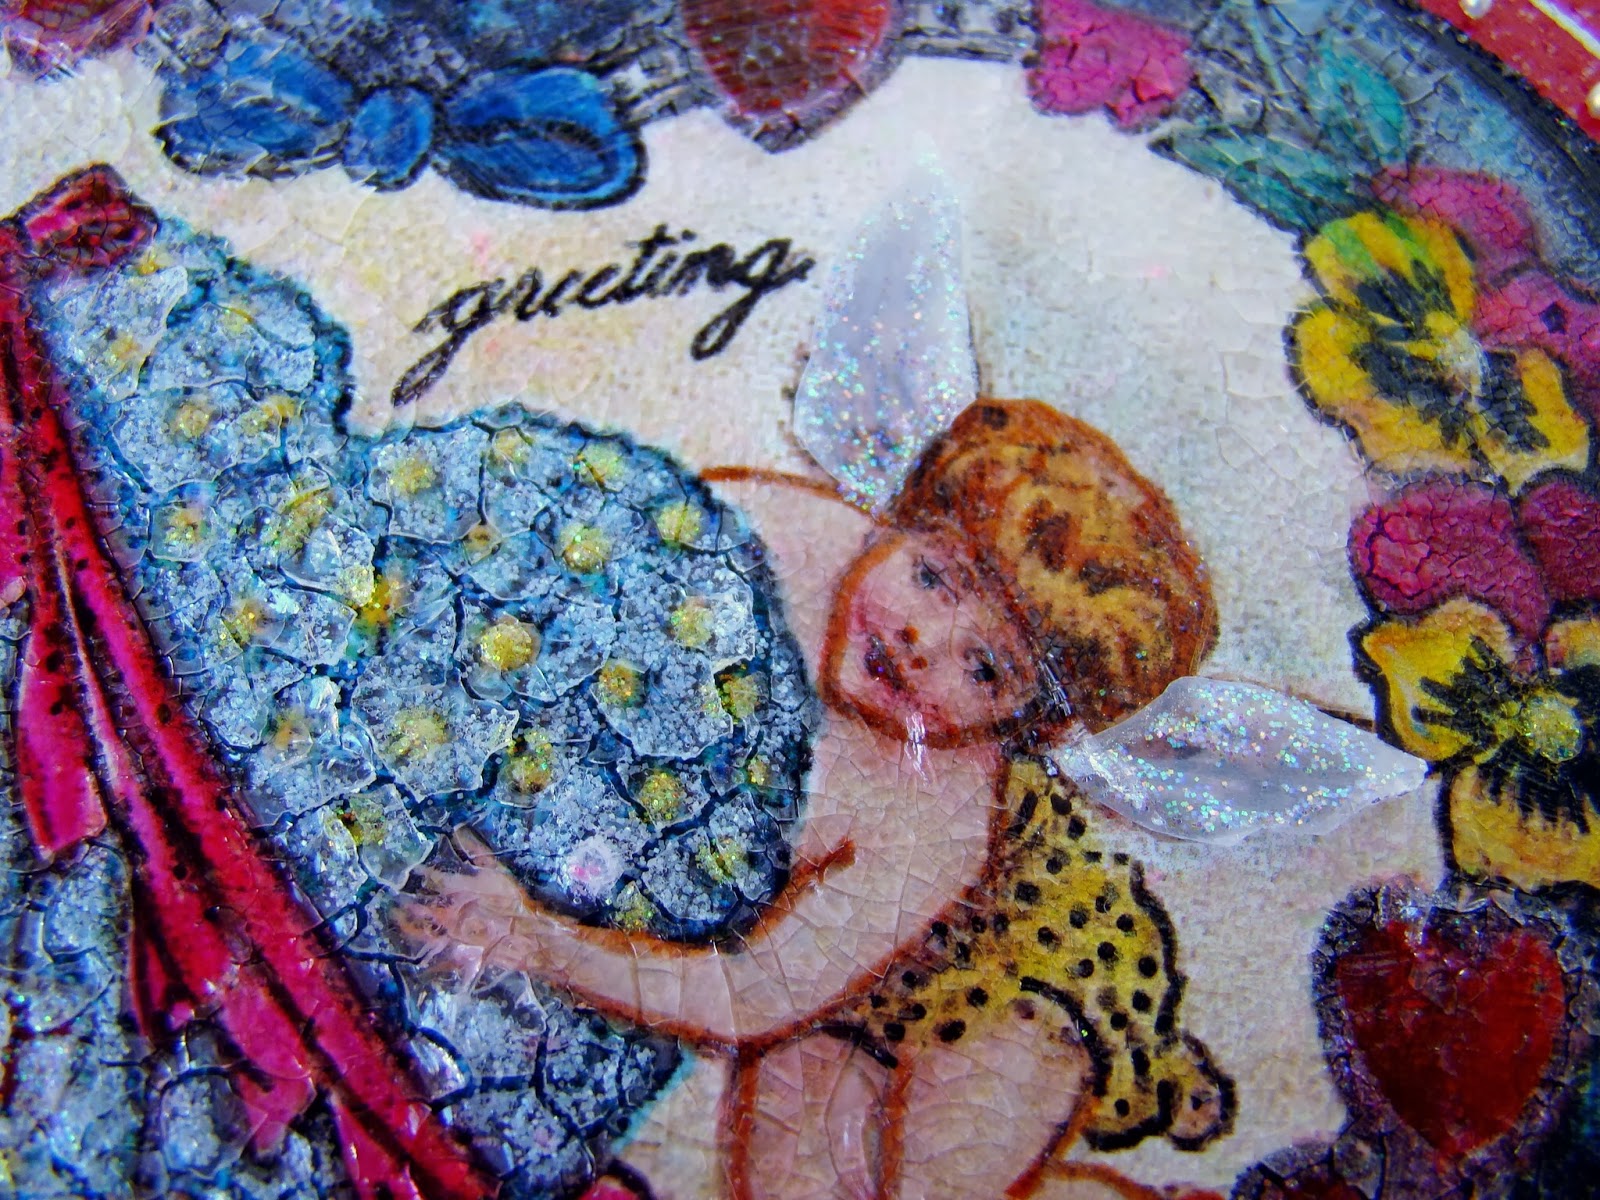
Loving the Oil Based Sharpie on the packing tape and used my regular Sharpie to draw in some black areas. I wanted to keep defining her so I took out my PITT pens to see what the results would be. I didn't worry about them beading up, because that effect made it look just like the gelli print...actually loved and created some shading...but I wanted to make sure it stuck to the tape so I sprayed the page with Helmars Crystal KOTE Varnish and crossed my fingers....and yay it worked! Here is the close up of the lips and under the chin where I did some shading.

Finished it off with a quote and had a heck of time finding a black marker ( Sharpie is dry, need another!! lol ) but in the end I used a Montana Marker and the Sharpie Oil Based marker in white. Stick a fork in me, I'm DONE!

Entering my art journal page in:
Simon Says Monday Challenge - Transparent

Friday, March 21, 2014

**********Enabler Alert*********

I AM IN CHARGE

March 30 - I am in charge day

OK, are you ready to want another tool? Well, this is just AWESOME.  The new Tim Holtz DistressMarker Spritzer Tool...only buy this is you want fine directed sprays of inks....like duh, who DOESN'T want that?? No blobbing or big splats, just fine little tiny dots!!! OH MY...this has now become my favorite play toy!!


My title and journaling came from page 126 in Joanne's book. I knew that writing with a pipette was something I would want to do. I did a sketchy outline of the letters and then inked around them with Dylusions Vibrant Turquoise and Squeezed Orange inks. I tried to loosen up my handwriting and wrote as fast as I could so it might look more artistic, lol 

Thank you Vickie L. for letting me use the Dylusions Ruby Rainbow stamp, done on tissue paper and fussy cut out. She is colored in with PITT pens and then a sketchy outline was created around her.

I was watching Terri Sproul the other night and she was doing an image transfer using a gel medium. It seems I have been seeing magazine transfers everywhere, maybe they are making a comeback? This one was done in 2 parts, the bottom ½ being one and the black ominous clouds above it done in a second session. I love the whole spooky scene.

Journaling and outlining created with my Sakura Gelly Roll, Signo white pen. Page sprayed with Helmar Crystal KOTE Varnish.

Sunday, February 9, 2014

Sundays with Sandee - whisper those 3 little words I want to hear


This was such a fun page to do and although I didn't mean to find a quote that had 3's in it, it just happened....and it made me happy! Simpatico!!

Love, love, love the moon and the owl ♥

The best thing about working with a pipette is how it really frees my style up, I mean you simply cannot be stiff when you have only a limited amount of control. Pipettes are also real good at making ink splatters too.

I really enjoy painting with inks, I think they are very favorite medium. I do spray all my inked pages with Helmar Crystal Kote Varnish to protect them and it really brings out the layers too.

I hope you play along, pick out 3 favorite things and make whatever you want. As always if you want to copy my work, I am more than flattered, I am honored. If you want to see the video of my making the page, then feel free to pop on over to the Frosted Design blog, we love to have you visit.

Friday, January 31, 2014

Art

The completed work of an artist which is the expression of creativity or imagination, or both that portrays a mood, feeling or tells a story; works of art collectively.
====================================
entering my art journal page in:

Simon Says Monday Challenge - This is where the cowboy rides away

OK, so the prompt made me think of campfires out in the prairie under star filled nights...which then morphed into a more "citified" oil lantern with moths fluttering around it ...

The background was made using a paint etching technique. The first layer are random colors of Ranger Distress Paints which I then covered with a thick layer of an acrylic/glaze mixture and then scratched through while the paint was still wet. A shot of Maya Roads whiteout was spritzed over the top and then it was sealed with Helmar Crystal KOTE Gloss Varnish. 

Loved creating the lamp as my centerpiece, cut from the Cricut Country Life cartridge, p. 64 and then shadow outlined with my pens and outlined the glass globe with stickles. The flame was created by free hand drawing it onto the vellum and then coloring it in with Sakura Glaze pens and the white Sharpie.

The butterflies began their life has very pretty dimensional butterflies from K&Co. but moths aren't that pretty to me, plus the pink and blue colors wouldn't work either. So, I did what any self respecting mixed media artist would do...I tore them apart and inked and grunged them up! I even added a layer of Ranger Distress Crackle Paint over them!

Wednesday, January 29, 2014

Helmar - Collage art journal page

Collage is something for everyone, anyone can do it regardless of age or skill level. It offers exciting visual effects and creative expression and I love the treasure hunt for just the right piece which can be shifted, removed, added to, glued down, covered up or torn off....a collage is as simple or as complicated as you make it.


Details and step out pictures can be found on the Helmar blog

Friday, January 10, 2014

Accession

 A process of increasing an art collection by addition; something added to what you already have (“the art collection grew through accession”).
================================================
Oh be still my beating heart, how I would love to get a one of a kind box of chocolates! This one happens to be a box of Godiva's that I wouldn't mind sinking my teeth into! I took a box of chocolates and altered the top with a vintage print and some inks and glazes.


After spraying my paper with Helmar Crystal Cote Gloss Varnish ( because my printer is a ink jet, and the ink would smear ), I then used my Sakura Glaze pens to color over the image.

I added some sweet vellum wings to the cupids for a little extra dimension. 

I LOVE adding the Ranger Crackle Paint on top of everything to give it a real vintage feel to it. Look at all those yummy cracks ♥

I think the lace around the outside edge of the box is the perfect touch for any feminine lady.

also used:
Ranger stickles, distress stickles, and liquid pearls

Sunday, October 27, 2013

Sundays with Sandee


Hi everyone, here is my very first art journal page using the awesome Dylusions Journal.

 I am finally taking some "me time" and just making pages for me to enjoy and not sell. If you want to see what I make and sell you can click on the tab at the top of my blog where it says "Mixed Media signs at the Art MoB"....but this....this is for me! As a matter of fact, if you look through my signs you will find one that is similar to this journal page, it was one that I would have liked to have kept for myself!

I thought this quote, which is one of my favorites would fit the theme of the journal. 
I added this to the front chipboard piece, it's the inside cover, when you open up the journal. 
( I'll wait until the journal is completed before working on the outside cover.

Here is the foam brush that I show you in the video over at Frosted Designs, if you want to watch it, then please follow this link.

Here are the scissors, pencil and brushes that I made using the exact same technique.
I enjoy adding inspirational words to the tools.

I used an eclectic lettering mix; of stickers, handwriting and cut by my Cricut.
( big hint: do NOT use coconut oil on your hands and then touch your work, because the Sakura glaze pens will not stick!! Hence the wobbly looking "great"...lol  rolling eyes at myself, this is what I get for being a touchy/feely person when it comes to my art...)

Sakura - glaze pens, waterproof pens
Reminisce white pen 

I hope you take this "journey" with me and we can share our journal pages on the Frosted Designs Facebook page!


Friday, October 25, 2013

Helmar makes Halloween a "snap"

It doesn't have to say Halloween in order to be considered spooky, take this fabulous quote by Morticia Addams, the fictional matriarch of "The Addams Family" created by cartoonist Charles Addams
( This was one of my favorite shows as a kid!! Did you watch it? )
To get you in the mood, feel free to trip down memory lane with by watching this:

Are you snapping your fingers and singing along with me? 

Helmar Craft Glue worked beautifully adhering the pearls and rhinestones to the plastic spider.

I added glitter over the glue to add more sparkle.

Helmar Liquid Scrap Dots was perfect for adhering the spider's body to the board. Since he was hollow, I filled up the space with the Liquid Scrap Dots and then smooshed him down to the board and released. When it was released the Liquid Scrap Dots filled in the gap between the board and the spider's body.
I used the Helmar Crystal KOTE Gloss Varnish
to seal in all the inks and sprays that I used creating the background.


other well enjoyed products:
Really Reasonable Ribbon
Want to Scrap - pearls
Martha Stewart - glitter

I love it when I make something and it sells within 24 hours, 
it was barely hung in the shop before it went home with someone!

entering this snappy sign in:

Simon Says Monday Challenge - spooky
Rhedd and Rosie's challenge blog - #18 Anything Goes 

Tuesday, October 15, 2013

Deco Arts ~ Gelli plate with stencils

For my Deco Arts post today, I wanted to play around with some different kinds of paints on my Gelli Plate, and I now have a new love, its the Satin Enamel paint and it is a hard, durable paint that flows and levels out to a smooth finish. It is awesome and I LOVE it, you don't have to use much at all, a little bit goes a long way on the gelli. 

I also played around with the Black Frost paint which is a glass paint. Keeping in mind that it is not intended to be used on a Gelli Plate, it did pretty well, and it cleaned off the gelli plate with a little elbow grease, I probably won't use it on the gelli again, but in a pinch it worked out fine. I used it on the chipboard raven too, so you can see the intensity color difference when it is used alone or layered on the gelli. 

You can see where I added the 3D Gloss enamel circles by adding the paint to the dot stencil, giving a nice layered and completely translucent effect.

There you have it, different types of paints from the norm being used.
A glass paint and a wood paint, both worked with different degrees of success.
So, overall, a mix of different paints were used other than the standard acrylic paints, with one paint standing out in a big way, which was the Satin Enamel.
 I loved it so much I have used it on several other projects:
The mixed media wall plate covers and the frame around my bathroom mirror
( Will be giving my lower cabinet the same treatment as the mirror frame. )

Deco Arts products used:
*Satin Enamel - sage green* dark walnut*

other well loved products:
Reminisce sticker letters, white pen

Helmar Krystal KOTE Gloss Varnish
Helmar 450 Quick Dry Adhesive

entering my 6 x 12" wall hanging in:
Craft Room Challenges - Our Feathered Friends
Challenges4Everybody - #31 Anything Goes
Carolyn Dube - October's Colorful Gelli Print Party